


Your shopping cart is empty!
Q
Can I wash my custom econo feather flags?
Yes, our custom econo feather flags are made from durable 4 oz. Polyester material. This material is washable and throws it into the washing machine will be ok. But We recommend you wash with cold water and let your flag air dry.
Q
What material is the custom pole flag make out?
Our custom pole flags are made from a durable 4 oz. Polyester. The 4 oz. Polyester is the good ideal material for flags due to its durable and flexible nature and long-lasting print quality features.
Q
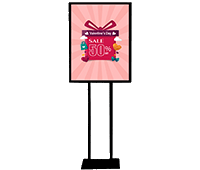
Do I need to buy flag poles and a base?
If you are starting using flags, we recommend buying the flag with pole and base to get a full flag kit. If you already have poles and a base, buying a flag banner can easily create new or replacement flags. By default, there are three ways for customers to purchase, including "Hardware+Graphic," "Graphic Only," and "Hardware Only." For the flag product, "Hardware+Graphic" means flag banner+pole; "Graphic Only" means flag banner only; "Hardware Only" means pole only. And the flag base is the upgrade accessories.
Q
Do you offer double sided feather flags?
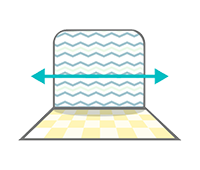
Yes. Single-sided and double-sided feather flags are also available. Single-sided flags are more translucent, while double-sided flags offer more vibrant color saturation. While selecting a single-sided option, the flag will be printed on one side and blank on the back. And The flag will be printed on double-sided while selecting double-sided options. For artwork,Single sided flags will need one page of artwork, and double-sided flags will need two pages.
Q
What material is the custom giant flag make out?
Our custom giant flags are made from a durable 4 oz. Polyester. The 4 oz. Polyester is the good ideal material for flags due to its durable and flexible nature and long-lasting print quality features.
Q
What material is the custom rectangle flag make out?
Our custom rectangle flags are made from a durable 4 oz. polyester. The 4 oz. polyester is the good ideal material for flags due to its durable and flexible nature and long lasting print quality features.
Q
Do you offer double sided rectangle flags?
Yes. Single-sided and double-sided rectangle flags are also available. Single-sided rectangle flags are more translucent, while double-sided rectangle flags offer more vibrant color saturation. While selecting a single-sided option, the rectangle flag will be printed on one side and blank on the back. And The rectangle flag will be printed on double-sided while selecting double-sided options. For artwork,Single sided flags will need one page of artwork, and double-sided flags will need two pages.
Q
Do you offer double sided pole flags?
Yes. Single-sided and double-sided pole flags are also available. Single-sided pole flags are more translucent, while double-sided pole flags offer more vibrant color saturation. While selecting a single-sided option, the flag will be printed on one side and blank on the back. And The flag will be printed on double-sided while selecting double-sided options. For artwork, Single sided flags will need one page of artwork, and double-sided flags will need two pages.
Q
Do you offer double sided giant flags?
Yes. Single-sided and double-sided giant flags are also available. Single-sided giant flags are more translucent, while double-sided giant flags offer more vibrant color saturation. While selecting a single-sided option, the flag will be printed on one side and blank on the back. And The flag will be printed on double-sided while selecting double-sided options. For artwork, Single sided flags will need one page of artwork, and double-sided flags will need two pages.
Q
Can I wash my custom feather flags?
Yes, our custom feather flags are made from durable 4 oz. Polyester material. This material is washable and throws it into the washing machine will be ok. But We recommend you wash with cold water and let your flag air dry.
Q
How to install the custom pole flag?
How to install the custom pole flag?
Step 1. Connect the pole set by screwing together.
Step 2. Fix the top of the flag banner to the pole by clipping the ring into the grommet.
Step 3. Fixed the bottom of the flag banner to the pole: Slide the clear ring clip from the bottom to the pole, tight up the clip by screwing the knob at the position according to the bottom of the flag and clip the ring into the grommet.
Q
What material is the custom feather flag make out?
Our custom feather flags are made from a durable 4 oz. polyester. The 4 oz. polyester is the good ideal material for flags due to its durable and flexible nature and long lasting print quality features.
Q
What material is the custom teardrop flag make out?
Our custom feather flags are made from a durable 4 oz. polyester. The 4 oz. polyester is the good ideal material for flags due to its durable and flexible nature and long lasting print quality features.
Q
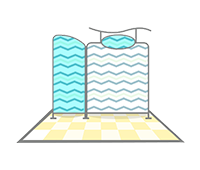
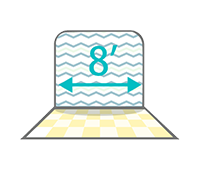
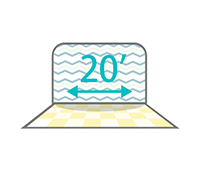
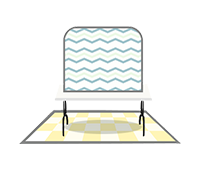
What different about Feather Angled Flags, Econo Feather Flags, Teardrop Flags and Rectangle Flags?
For these kinds of flags, Feather Angled Flags and Econo Feather Flags are the popular choices because of their unique shape and eye-catching features; Rectangle Flags can offer the largest printable area.; Teardrop flags are drawn tauter and tend to be the most stationery of our three options.
 626.829.2660
 sales@signleaderdisplay.com
 550 S Glendora Ave #203
West Covina, CA 91790, USA
550 S Glendora Ave #203
West Covina, CA 91790, USA


